It was a long drive up from Southampton, but a friend of mine (and fellow kit car enthusiast) came up with me and shared the driving. Also a big thank you to Jeremy's wife Stella who did a fantastic job ensuring our cups of tea never ran (she also does an awesome beans on toast). I also thought the dogs name was fantastic..........'Lola'.
First off......the colour.....I'll be honest and say I was terrified about this. The colour I wanted was gulf powder blue, but this was not possible, so Jeremy recommended French blue. He sent me a sample, but I could not really get a good feel for what it would end up like so, at risk, I agreed. Turns out I had nothing to worry about, the colour (IMHO) was fantastic, and I think will look great with either an Orange or Black stripe when finished.

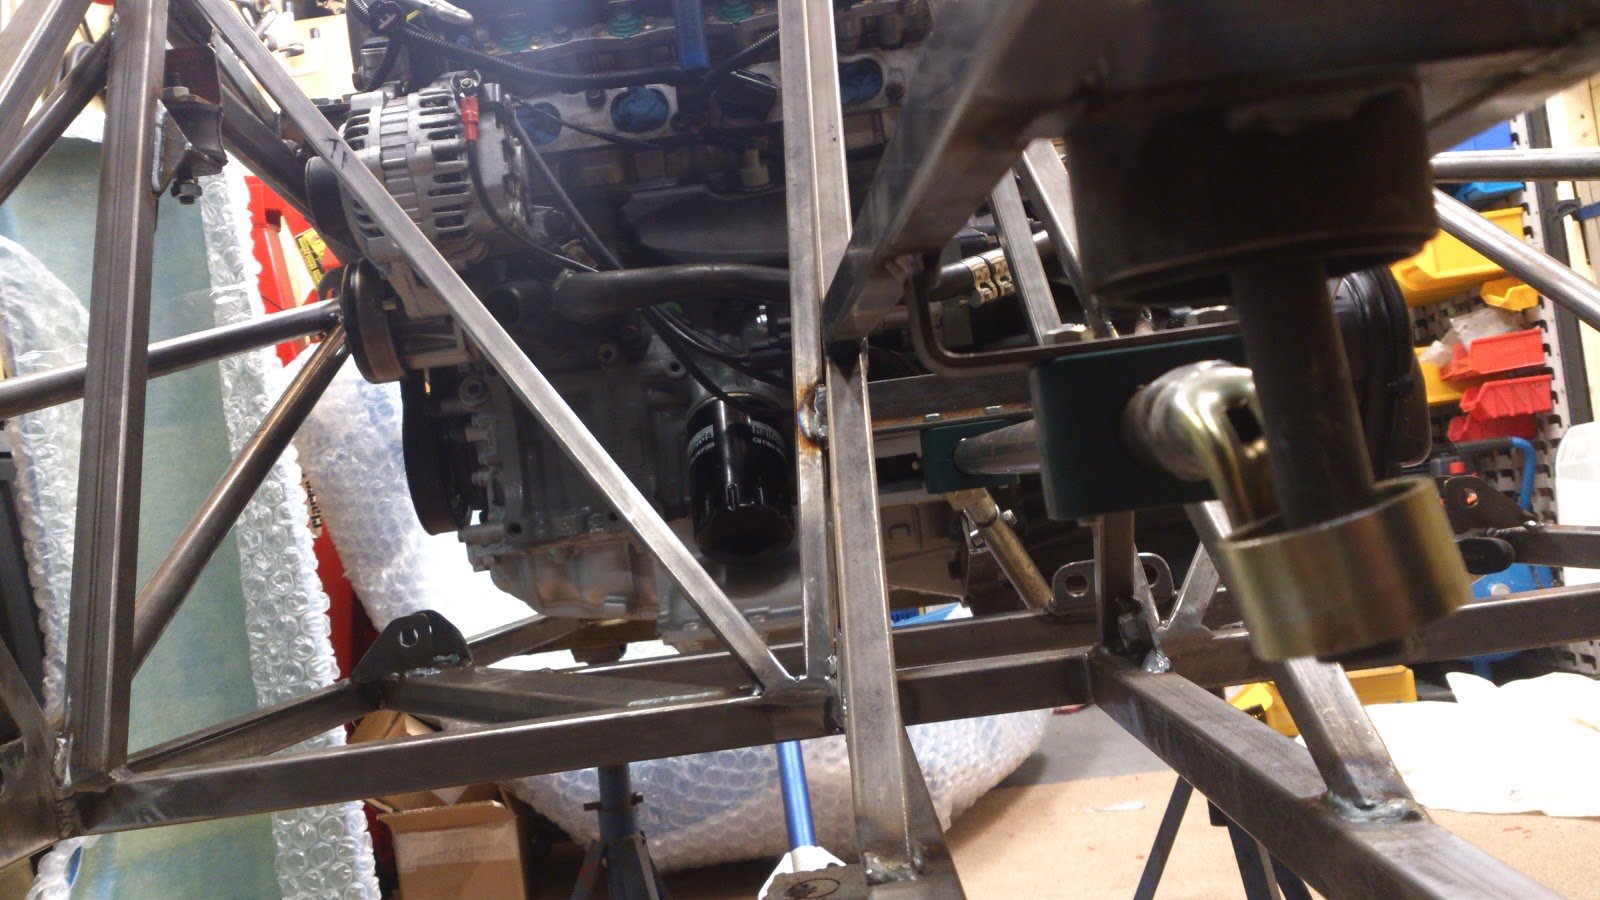
I took up the Puma engine so we could get an engine mount welded up in situ. Of interest, the Puma engine has a different mount to the standard sigma / Zetec Se engine. This is down to the variable cam shaft gubbins needing more space behind the cam belt cover.

Anyway, engine went in, mount was welded up, and we left the engine in situ for the journey home.
Now, my plan was to get the chassis powder coated asap...But now the car is home and the engine is still in situ, it makes sense to do some of the installation work before I powder coat and panel the chassis. To start with, and ease me into the process, I'm tackling the gear linkage.
I'm sure I've mentioned it before, but the mechanical linkage found on the older Fiestas and the Puma really is very good, and to maintain this, Sylva developed a system for keeping it. The J15 and the Riot use a curved bar that comes back under the gear box and is connected to the selector shaft. Then, by using linkages from the Donor car you can maintain a decent quality shift.
I've taken a few pics of how this works, and hope this will help future builders as I could not picture it when I was reading the manual:


Looking good Jenko, impressed with your progress. Yep, the colour is going to look very stylish with your stripe.
ReplyDeleteMany thanks Chris.......Looking forward to getting it powder coated and all the panneling done...then I can start bolting bits on and making it look like a car.
ReplyDeleteOoh, you've got an exhaust manifold already! When are you sleeping?
ReplyDeleteI cheated....I bought it with the car :-)
ReplyDelete