Seems to be flavour of the month......the word 'revisited'.
So, back on to the subject of shocks.....Yes, I've changed the perfectly good avo's for no other reason than weight saving. With the ethos of this build focused on weight, having a set of 2.25inch steel shocks peeking at me every time I opened the garage door was just too much for me to take, so a rather nice set of Aluminium gaz golds were ordered. These are 1.9inch, and after getting both sets on the scales (with springs), the weight saving was 3.4kgs.....that's 3.4kgs of unsprung weight saved....not bad. I stayed with spherical bearings rather than rubber bushes as the car will 'hopefully' be spending much of its time on track. The spring rates of 200lbs front and 300lbs rear have also stayed as this seems to be a good set up judging by the experience of other J15 owners.
As mentioned in the last update, the hispec rear callipers have now been fitted, the brake system has been bled, and I had some handbrake adjusters machined up which hold the cables in situe. The brakes feel nice and hard, so let's hope this stays when the car is on the road. One thing I need to keep in the back of my mind is the brake bias bar, which, once set set up to ensure the rears do not lock up before the fronts, needs locking of for iva.
Work continues on the side pod panels, but this is proving to be a long task...probably because panelling is one of my least favourite jobs, and whenever I do get time on the car I'm always looking for something else to do!. I really want to get this done as finishing this is the catalyst for dropping the central tub on, and that of course is the catalyst to getting the rest of the body work on.
Also been playing around with the seat position and belts. With myself in the car I think they are ok with respect to not touching anything.
A pic of the wiring loom connector to the rear clam.
Sunday, 9 March 2014
Thursday, 27 February 2014
Rear Brakes - Revisited
It's been a bit of a struggle, but we got there in the end. To fit the Hispec IVA callipers, the uprights needed some minor modification....It's taken far too long, but to be fair to Hispec they did the modification and the callipers now fit perfectly. Basically, they say that the calliper will fit a golf, but actually it doesn't, it has the same hole pcd, but the offset is way out.What this all means is a). I now have plenty of Clearence for 13 inch wheels, b).the handbrake cable has a good un interrupted path. c). nothing is anywhere near the CV boot....All in all, a decent modification.
A few pics of the engine mount and the drop I added to lower the engine. Also shown is the later J15 engine rubbers.
Saturday, 22 February 2014
Sealing the side pods, and redoing bits I'm not happy with.
Things have slowed a little recently, no real reason, but probably because I'm doing jobs I'm not overly interested in......However, they need to be done so tough!.
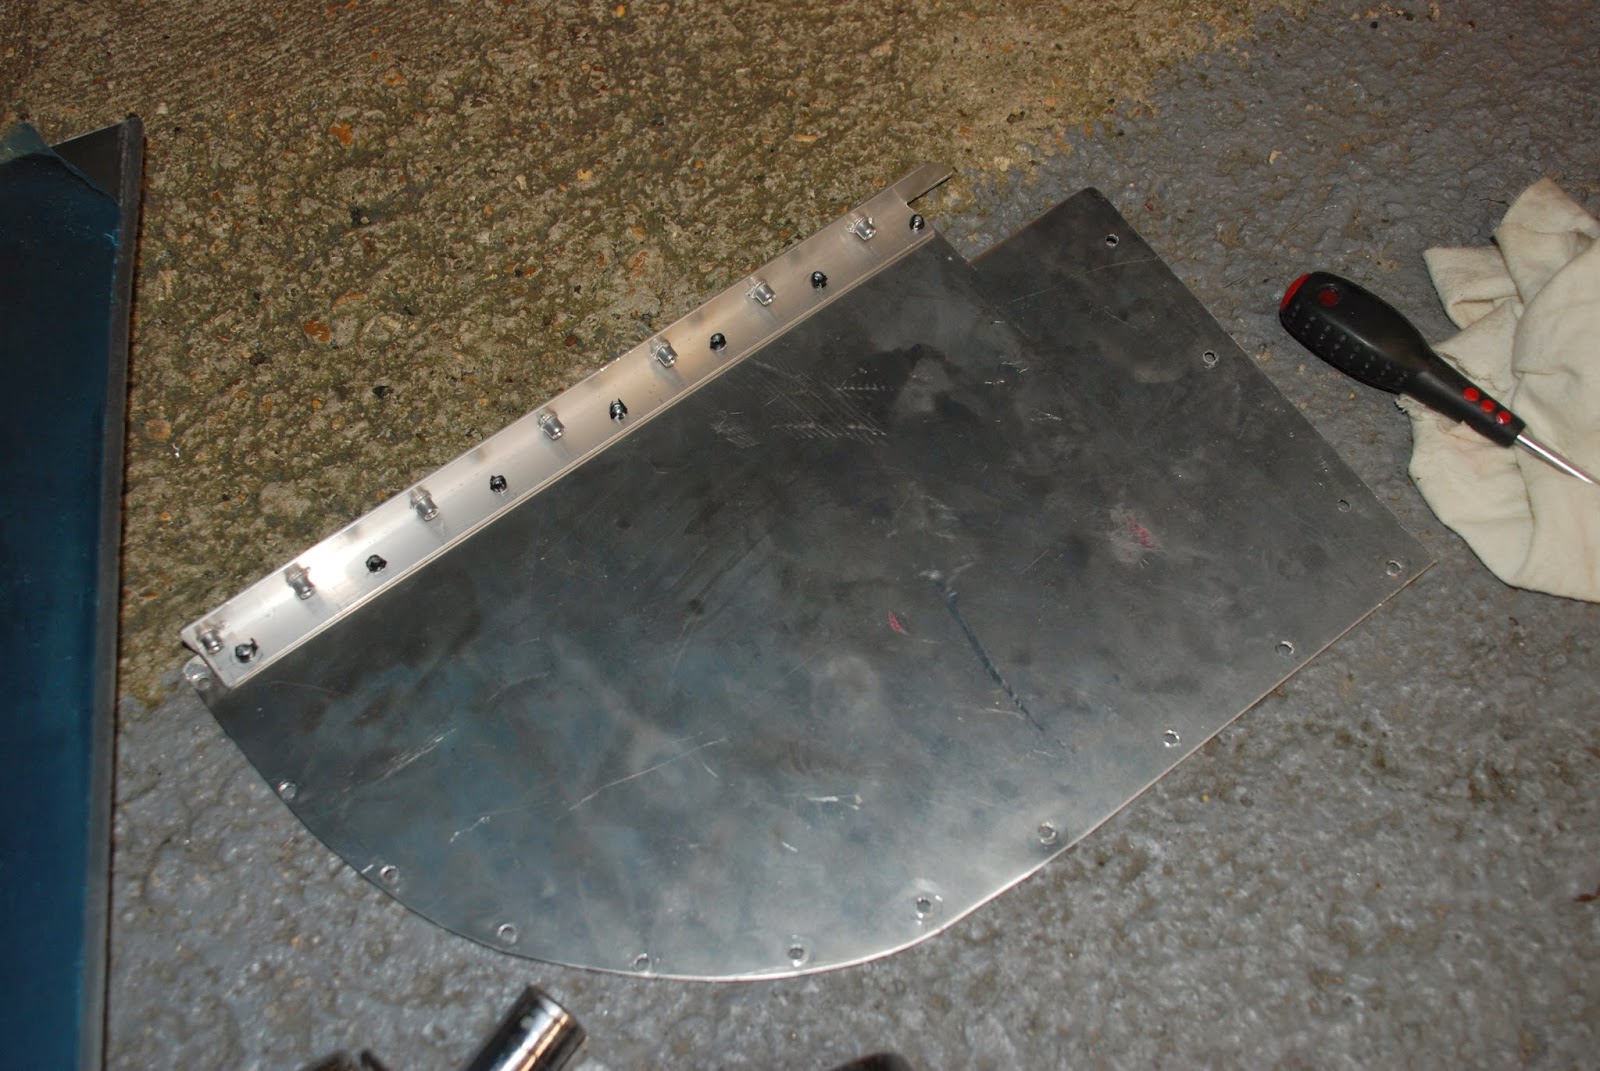
First off are the side pods, or sills.........Most of my electrics reside in this area so it's important that they are protected from the elements. The problem here is of course they sit perfectly in line with the wheels, which of course are very effective water / mud / grime spitting machines. I've started with the basics which means getting as good as possible seal, but more work will be needed creating an actual wheel arch. Meanwhile some alloy fabrication is in progress (this will be powdercoated of course). I liked the look of the older 'riveted' cars, but there's no opportunity on the J15 to get this, so I opted to bolt the panels into the side pod.
I've also been doing....make that 're-doing' jobs that I've not been happy with, one of these was the fuel hoses from the tank. I've neatened them up, I can now look at them without pondering that I could have done them better :-)
What else has been happening.....Ahh yes....trim........interior is all but finished, and I've put the rubber u channel over the seats.
First off are the side pods, or sills.........Most of my electrics reside in this area so it's important that they are protected from the elements. The problem here is of course they sit perfectly in line with the wheels, which of course are very effective water / mud / grime spitting machines. I've started with the basics which means getting as good as possible seal, but more work will be needed creating an actual wheel arch. Meanwhile some alloy fabrication is in progress (this will be powdercoated of course). I liked the look of the older 'riveted' cars, but there's no opportunity on the J15 to get this, so I opted to bolt the panels into the side pod.
I've also been doing....make that 're-doing' jobs that I've not been happy with, one of these was the fuel hoses from the tank. I've neatened them up, I can now look at them without pondering that I could have done them better :-)
What else has been happening.....Ahh yes....trim........interior is all but finished, and I've put the rubber u channel over the seats.
Thursday, 6 February 2014
Lights and more carbon, and some fuel tank mods.
Long ago I decided not to use the rear lights provided with the kit...the simple reason for this was I had found some rather nice looking LED lights that would not need the larger holes cut out from the rear clam. Anyway, this is them, and I think will look good on the J15.
Back on to the fuel tank, on the back of some discussions regarding fuel tank venting, I decided to revisit my simplistic 'connect a pipe' system. As luck would have it, I salvaged the fuel tank vent from the Puma, and kept it!.....a simple solution, and the fuel tank is now vented via a nice valve that lets air out, but closes if there is fuel on it (i.e. if you flip the car).
Last but not least for this post.....the interior.
For the top panelling I'm using 2mm carbon fibre...for no other reason than I think it looks good. For the sides to remain IVA compliant I used some rubber strip (normally found on wheel arches). This was glued on and is also held in via the screws holding the panels down. The end result is a good quality panel, with a nice finish that (in theory) should not squeak, and offer some level of water resistance.....
The gear leaver uses the same gator removed from the puma, and is simple in design and clean looking.
Back on to the fuel tank, on the back of some discussions regarding fuel tank venting, I decided to revisit my simplistic 'connect a pipe' system. As luck would have it, I salvaged the fuel tank vent from the Puma, and kept it!.....a simple solution, and the fuel tank is now vented via a nice valve that lets air out, but closes if there is fuel on it (i.e. if you flip the car).
Last but not least for this post.....the interior.
For the top panelling I'm using 2mm carbon fibre...for no other reason than I think it looks good. For the sides to remain IVA compliant I used some rubber strip (normally found on wheel arches). This was glued on and is also held in via the screws holding the panels down. The end result is a good quality panel, with a nice finish that (in theory) should not squeak, and offer some level of water resistance.....
The gear leaver uses the same gator removed from the puma, and is simple in design and clean looking.
Wednesday, 5 February 2014
New header tank
I ended up studying a load of images on google of various OEM header tanks, and ended up with one from a Corsa, which, coincidentally can be found new on ebay for around £13!....As you can see from the above pic, the bracket angles fit nicely with the chassis and the tank is positioned nicely without having to fabricate and special frames......The only thing I may have to do is cut some small slots on the central tub to go over the brackets.
Friday, 24 January 2014
Finishing up on the wiring.
There have been many discussions on the fog lights and what / how / when etc they need to be switch on, and with what lights.....It's not that clear in the IVa manual, but my initial wiring allowed them to come on with the dip bean ONLY. I have come to the realisation that to play it safe they should also be able to be used with the main beam...this was a pain in the wotsit, and required some though on how to integrate this into the previous loom....The solution came with the cunning use of a couple of 12v Diodes, but I now think I'm covered for IVA.
The light looms are being designed to be quick release in the event the front or rear clam shells need removing.....so I'm splicing in a good quality waterproof ford connector.
Also recently finished off was the pedal box cover (Carbon of course)....a few holes were needed to allow for the steering column and the brake light switch. It was actually a difficult panel to fabricate as the pedal box is...umm...well....sort of wrong..in that I mean not square, and a bit of an odd shape. You can also see in the pic below the addition of the brake fluid warning signs..again, an IVA requirement.
The main switch panel is also complete and sits in a panel in the drivers pod. It releases via 3 m4 bolts for ease of access if required, and the aux fuse box is located under the switches.
The main Fuse and relay box is in the passenger side pod (towards the rear).
Cover on:
Cover off:
For most of the wiring, I've used the slit convoluted tube to offer a level of protection, and where required some loom tape. The drivers side pod also has a small loom which takes the speedo, temp, oil signals from the engine. This comes together with the throttle cable on exit from the main chassis:
Finally, a few other pics of other areas of wiring:
The light looms are being designed to be quick release in the event the front or rear clam shells need removing.....so I'm splicing in a good quality waterproof ford connector.
Also recently finished off was the pedal box cover (Carbon of course)....a few holes were needed to allow for the steering column and the brake light switch. It was actually a difficult panel to fabricate as the pedal box is...umm...well....sort of wrong..in that I mean not square, and a bit of an odd shape. You can also see in the pic below the addition of the brake fluid warning signs..again, an IVA requirement.
The main switch panel is also complete and sits in a panel in the drivers pod. It releases via 3 m4 bolts for ease of access if required, and the aux fuse box is located under the switches.
The main Fuse and relay box is in the passenger side pod (towards the rear).
Cover on:
Cover off:
For most of the wiring, I've used the slit convoluted tube to offer a level of protection, and where required some loom tape. The drivers side pod also has a small loom which takes the speedo, temp, oil signals from the engine. This comes together with the throttle cable on exit from the main chassis:
Finally, a few other pics of other areas of wiring:
Sunday, 12 January 2014
Shafted!.....
.......in a good way of course.
Drive shafts..........ah yes, drive shafts.
Unfortunately, the puma drive shafts are a little too long for the J15. There are two viable options...shorten the existing shafts from a Puma / Fiesta or get some new ones made up. My first thoughts were to shorten. I had a few quotes from to do this ranging from £280 to £500, which to me seemed way too high. I ended up using a small engineering firm (and by small, I think it's one chap with a Lathe), said gentleman has been making drive shafts for many years, so I sent him up a shaft from the Puma, and he copied it exactly, all be it being 40mm shorter for the drivers side and 37mm for the passenger side. The shafts made from EN24T, and on assembly fitted perfectly...So, I'm a happy chap, as technically speaking the car could now potentially move under it's own steam.
Another recent purchase were the seatbelts. From experience with my Westfield, they had to be 3inch, so I called Titon in Poole who offer a custom service and can tailor the belts to your requirements. For this build short belts are needed, with snap hooks on the shoulder straps, and eye fixings for the lap straps with the lap adjustments that pull down from the buckle rather than up from the fixing. Anyway, fantastic service from Titon who are a pleasure to deal with, and some very nice quality belts and a good price...can't ask for more than that.....
Drive shafts..........ah yes, drive shafts.
Unfortunately, the puma drive shafts are a little too long for the J15. There are two viable options...shorten the existing shafts from a Puma / Fiesta or get some new ones made up. My first thoughts were to shorten. I had a few quotes from to do this ranging from £280 to £500, which to me seemed way too high. I ended up using a small engineering firm (and by small, I think it's one chap with a Lathe), said gentleman has been making drive shafts for many years, so I sent him up a shaft from the Puma, and he copied it exactly, all be it being 40mm shorter for the drivers side and 37mm for the passenger side. The shafts made from EN24T, and on assembly fitted perfectly...So, I'm a happy chap, as technically speaking the car could now potentially move under it's own steam.
Another recent purchase were the seatbelts. From experience with my Westfield, they had to be 3inch, so I called Titon in Poole who offer a custom service and can tailor the belts to your requirements. For this build short belts are needed, with snap hooks on the shoulder straps, and eye fixings for the lap straps with the lap adjustments that pull down from the buckle rather than up from the fixing. Anyway, fantastic service from Titon who are a pleasure to deal with, and some very nice quality belts and a good price...can't ask for more than that.....
Subscribe to:
Posts (Atom)


